Showing posts with label recycle. Show all posts

Monday, March 12, 2012

Mommy Monday with Uses for Fruit Rinds

At our house...my kids eat a lot of fruit, I mean A LOT! Fruit for every meal plus for snack time. We fortunately live out in the country with birds and squirrels so I usually throw the cut up rinds out to them to enjoy for a snack. It got me thinking...what other uses are there for fruit rinds? So I did some lookin' and this is what I found...some of these ideas are very interesting and I will be trying them! Happy Monday ya'll :)

USES FOR WATERMELON RINDS


Here are a few uses for the rind instead of just tossing it out in the trash.

- using the rind for Thai Gaeng Leang Soup, the rind is one of the main ingredients, recipe here
- candying the rind to make a sweet treat with granulated sugar, recipe here from watermelonrind.com
- pickling the rind...such as you would pickle cucumbers, recipe here
- mmmmmmmmmm...watermelon rind preserves from Amazon
- cut up the rind and toss it in a salad

DIY PUMPKIN AND LEMON CANDLES from momtastic


CITRUS VOTIVE CANDLES from Divine Party Concepts


MAKE A CLEMENTINE CANDLE from Apartment Therapy


I would love to hear any of your ideas for uses of left over rinds...I didn't even get to uses for apple and pear rinds or banana peels...another post for me in the future!


Friday, March 9, 2012

Fun Friday with Harvesting Rain Water

I have only lived in Middle Tennessee for a year now...I am from out west where it is dry and barren and you are lucky if you see rain. So these crazy and beautiful rain filled thunderstorms here are amazing! And you do not have to have a sprinkler system to water your lawn...that is amazing to me. All this rain has got me thinking(uh oh)...I am curious about harvesting rain water. So todays Fun Friday activity will be links and articles of ways to save, store and reuse all of this rain water. What a great teaching opportunity for your kids too! The value of using our resources.

How to build a rain barrel from The Family Handyman...great tutorial! It offers great pictures and step by step instructions...and the greatest thing is you can build your own for under $100!


Harvesting Rainwater offers a great variety of books filled with information!


And they have a wonderful blog...Drops in a Bucketwhich offers abundant information on rain harvesting too from historical harvesting techniques to modern day systems like this awesome salmon one.


So lets get out there and teach our children the importance of using our resources...especially if you live in such a rain filled climate!

Monday, February 20, 2012

Mommy Monday with Mason Jars

Mason jars...we all have them. Or even empty pickle or jelly jars. What do you do with them when they are empty? Recycle? Reuse? Here are a few ideas I love...and will be trying.

I absolutely adore this craft idea from Annaboo's House! Simple. Wrap your empty jars with lace, garden twine, old doilies...and light. So classy and beautiful.


These cute glitter mason jars from tatertots & jello are perfect for holidays - make a themed one for each holiday!


And who would have know painted mason jars could look so cute?! Great home or wedding decor...Oh Lovely Day provides you with a great tutorial.


Ooooooooooooooooo...Mason Jar Meals!!!! from katearends.com


And finally...a mason jar soap dispenser from Blissfully Content!


There are so many fabulous mason jar ideas out there...what are a few of your favorites?


Tuesday, February 14, 2012

Welcome Wednesday with Mylana and a Giveaway

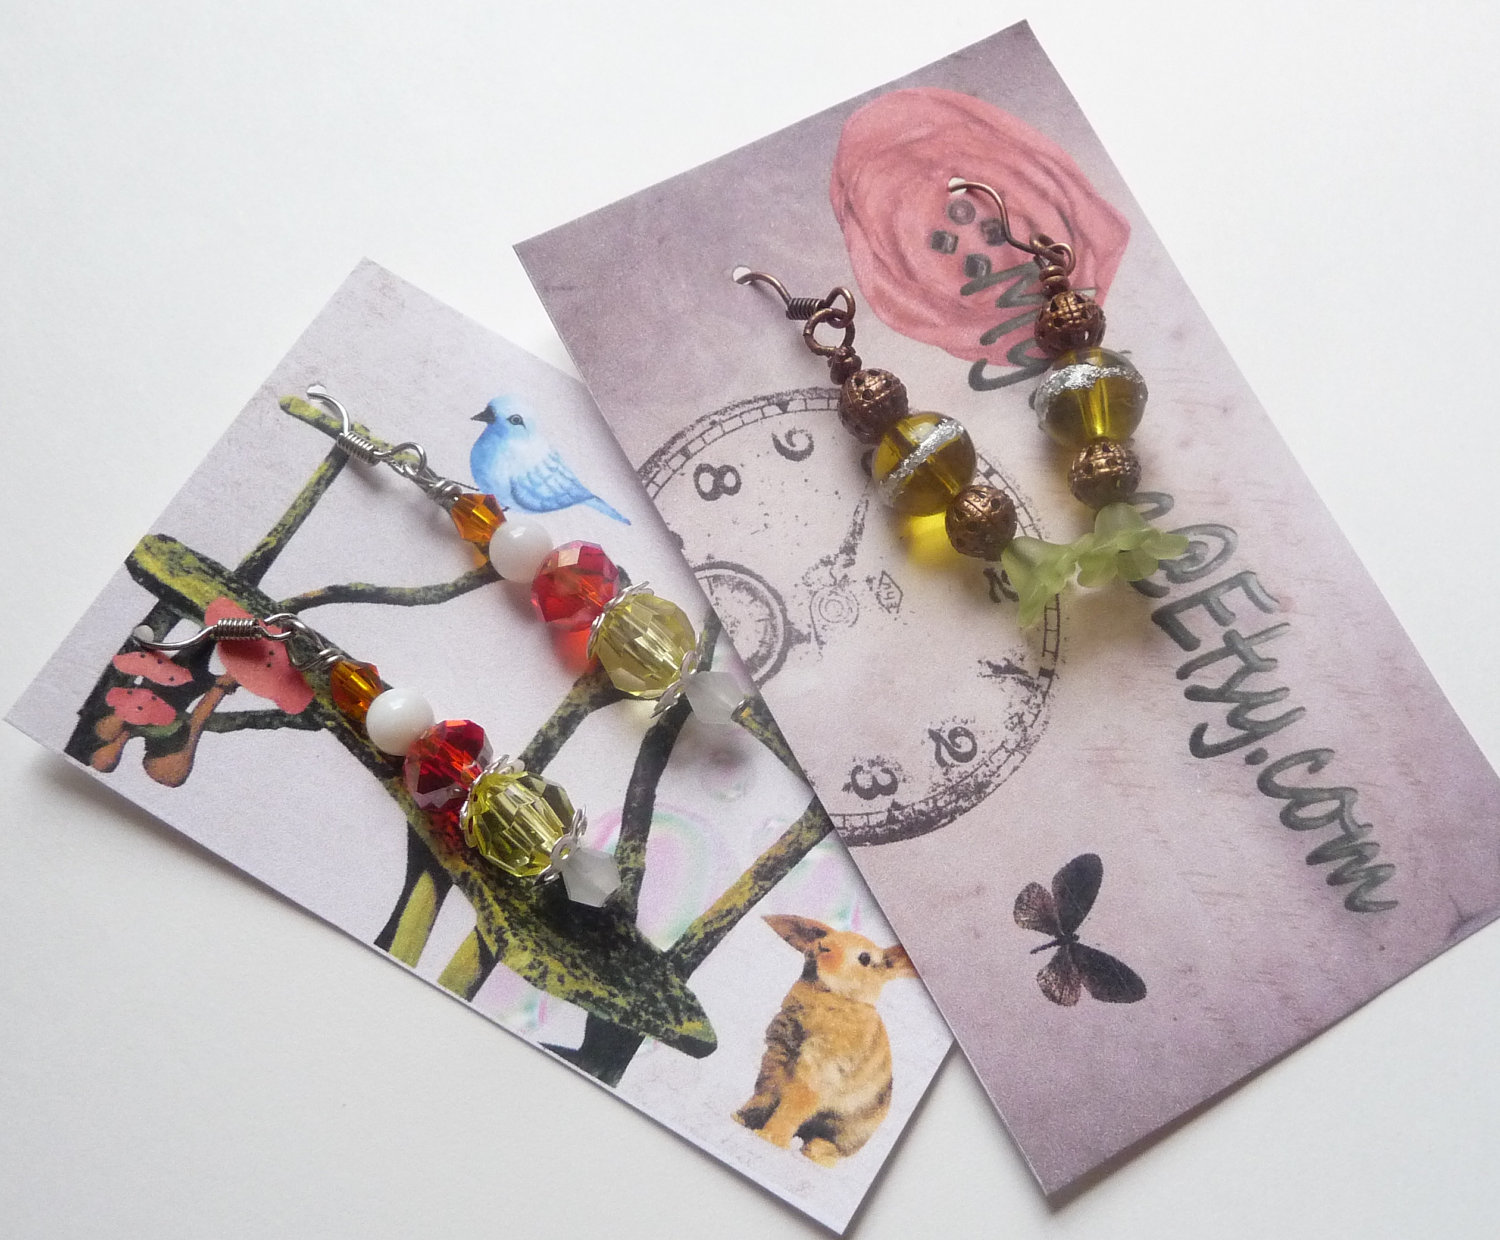
Please welcome Clare and her Etsy shop, Mylana


Ecclectic, bright, and unusual are the key words she uses to describe her shop filled with soaps, candles and jewelry. I love her use of recycled materials for her packaging and shipping. Most of her soaps are vegan, with her most popular recipe containing olive oil and coconut oil, for a simple, but luxurious soap.

Currently, she is running a promotion with the code "TEAMBORO" for 15 % off.

Mylana has also offered two of her items from her shop for a giveaway...please see the details at the end of this post or check it out under the "Giveaways" tab under my blog header. One lucky winner will win both!

Let's meet Clare and discover her Etsy shop, Mylana.

What is the first creative memory you have?

The first memory I have relating to something creative is when I was maybe 4 or 5, I was looking at the wood knots and patterns in our garage door and I remember later trying to replicate the swirls and lines in a drawing.

What or whom began your creative journey on Etsy?
After my husband died in 2010 of cancer, my sister contacted the site Regretsy (features the worst things on etsy) about having an urn donated for his ashes, because we couldn't afford one, or his funeral. When they said yes and donated the urn, I looked at the

site and then thought about Etsy and wondered if I should set up a shop for some extra money.

How did you come up with your shop name?
I like to play the video game World of Warcraft and it was the name of my first character- a troll priestess.


Describe what creations you have in your shop?
Mainly, I make soap, candles, and jewelry. I do have some odds and ends like magnet and incense, but those are items I only make occasionally.

What insprires you?
I try to be inspired to make things out of what I have versus planning on what to make and ordering ingredients. I want to use up materials I have first. My biggest inspiration is nature and foods. Lately, I have been on a big green tea kick- I love that scent!

What do you listen to or watch while creating?
I usually listen to the itunes radio. I like new age music and some electronica/dance. I also like Tori Amos.


Please share a favorite recipe
I love to cook and usually don't use recipes, just add a pinch of this and a handfull of that, but this is th e basic version of an easy vegetarian chili I make:
2 cans diced tomatoes
1 can black beans
1 can red beans
1 12oz package frozen corn
2 pouches of Chili Seasoning
1/2 Onion, Diced
Salt and Spices to taste (garlic, red pepper flakes, cumin)

I mix everything together in a stockpot and simmer it for about 30 minutes, adding water if it gets too thick. This freezes up really well.

Where else can we find you?
Facebook
Twitter
I only sell on Etsy right now, but I do blog for our regional Tennessee Etsy Team:
borocrafters.blogspot.com/

Now see what you can win!


Winner will get BOTH pairs of earrings!!!
***You do not have to do all of the entry options...but keep in mind, the more you do the higher your chances are of winning!


a Rafflecopter giveaway


Friday, February 10, 2012

Fun Friday - Fun With Plastic Containers

Todays Fun Friday will include some great activities and crafts using plastic bottles...have a great weekend!


How To: Make a Mini-Marshmallow Popper from Real Simple

Once you’ve cut off the bottoms of these paper cups and slipped on balloons, you’ve got a springy surface for launching spongy sweets into the air. Host a contest to see who can pop marshmallows the farthest or get the most into a bowl that’s a few feet away.

What You Need
Scissors and utility knife, markers, ruler, rubber bands, glue, tape (transparent, duct, masking, or colored), gift wrap or decorative paper, kraft paper, balloon, uninflated, paper cup, bottom cut off, mini marshmallows

Total time: 10 minutes
1
Knot the end of the balloon, then snip off 1⁄2 inch from the top.
2
Stretch the balloon over the cutoff end of the cup so that the knot is in the center. (You’ll need to hold the balloon in place when you “pop,” or secure it with a rubber band for little hands.)
3
Place a mini marshmallow into the cup so it fits snugly in the knotted center of the balloon. While aiming the cup away from you (and others), pull the knot back, release, and see how far you can send the marshmallow soaring.

DISCOVERY BOTTLES from Pre-school Play


I am only showing you a few...check out all of the "discovery bottles" Pre-school Play has created...so, so cool!


Marbles in Shampoo


Animals hidden in shredded paper


Cut up pipe cleaners. Use magnetic wands to draw the pipe cleaners up the side of the bottle.

There are so many more amazing "discovery bottles" on their blog...really great to help your little ones explore!


IT'S NOT A GLITTER WAND by Pink Pistachio


Pink Pistachio is an amazing site and I love her

personality...definitely worth checking out her page and following!


PATIO LIGHT COVER by About.com Family Crafts


Start collecting small, plastic water or soda pop bottles and make your patio or backyard festive with strings of light and these colorful little covers.

•Age Guideline: 8 Years and Up
•Time Required: 60+ minutes (Does not include drying time)

The above age and time guidelines are estimates. This project can be modified to suit other ages and may take more or less time depending on your circumstances.

Materials Needed:

•String of Lights
•Small Plastic Bottles (One for Every 2 Lights on the String)
•Transparent Glass Paint
•Craft Wire
•Scissors and/or Utility Knife
•Paint Brush
•Wire Cutters

Instructions:
Using the scissors or utility knife, cut the bottles in half. You will use both halves to make different shaped patio light covers. If you want all your covers to be the same shape, use just one half. You can simply leave the cut edge straight, or you can cut edge into a scalloped design or any other design you like.

Paint each light cover using the transparent paint. You can paint the entire light cover or simply paint abstract or other designs. Let the paint dry.

Use the tip of the scissors or the craft knife to make a small hole in the center of what would have been the bottom of the bottle. You should be able to slip the light cover over the bulb so that the light covers look like little lamp shades.

For what was once th top half of the bottle. use the tip of the scissors or a utility knife to make a small hole near the top of the bottle. If you bottle are very thick, this hole may have to be down below where the top of the bottle screwed on. To attach the light, cut a small piece of craft wire and poke one end of the craft wire into the hole. Stick the light into the drinking hole in the top of the bottle and wrap the wire around the wire of the light. Twist the two ends of the wire together to hold the light in place.

You should now be able to hang your patio lights up and enjoy!